To discover servers using RDA, you can directly add servers to RDA or scan servers by CIDR block.

To add a large number of servers at a time, see Importing Resource Information.
Prerequisites
- You have configured a license by referring to License Configuration.
- You have added credentials by referring to Credential Management.
- You have installed the server collector by referring to Plugin Management.
Adding a Server
- Double-click the RDA icon on the desktop or RDA.exe in the installation directory to start the RDA client. Enter the username and password to log in to the RDA console.
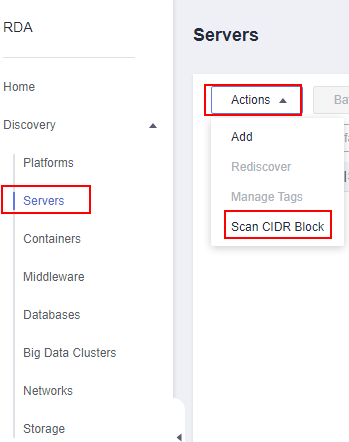
- In the navigation pane on the left, choose Discovery > Servers.
- Choose Actions > Add in the upper left corner of the page.Figure 1 Adding a server
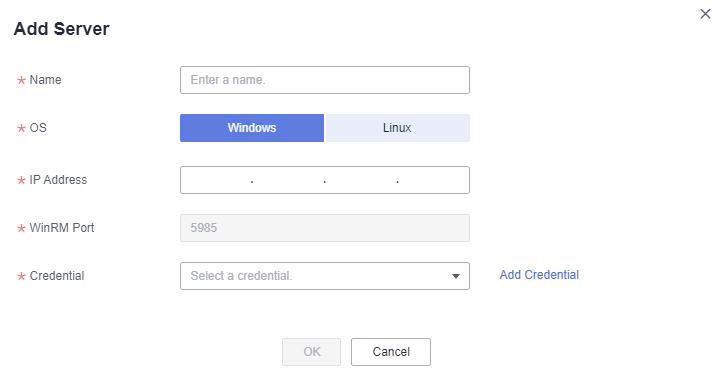
- Enter the required information by referring to Table 1.If no credentials are added in advance, click Add Credential next to the Credential box. In the expanded area, enter the credential name, and server username and password, and click Save Credential. Then click OK. To learn how to add a credential, see Credential Management.
Table 1 Parameters Parameter
Description
Name
User-defined
System Type
Set this parameter based on the actual system type.
NOTE:If the RDA for Linux was installed, Windows servers cannot be collected.
IP Address
IP address of the server to be discovered
Credential Name
User-defined
Account
Actual login account of the server
Password
Actual login password of the server

View the added server in the list. The system automatically checks the credential binding status and discovers the server.
Scanning Servers by CIDR Block
CIDR block scanning may be intercepted by the gateway or security protection software. As a result, the scanning fails. Check whether the scanning can be performed to collect server information based on your network environment.
- Double-click the RDA icon on the desktop or RDA.exe in the installation directory to start the RDA client. Enter the username and password to log in to the RDA console.
- In the navigation pane on the left, choose Discovery > Servers.
- Choose Actions > Scan CIDR Block in the upper left corner of the page.
- Click Create Scan Task in the upper right corner.
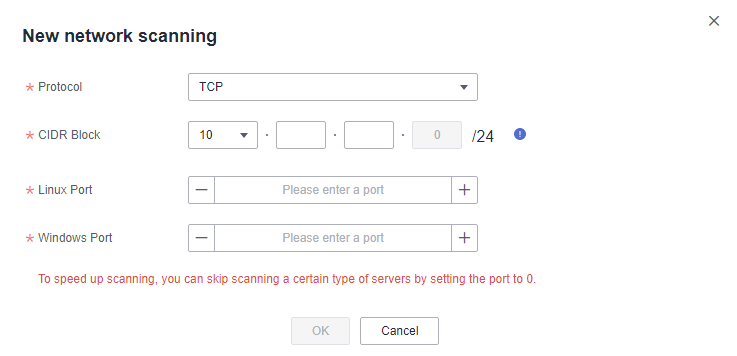
- Set parameters based on the Table 2 and click OK.You can view the created task in the list. The system will automatically start the task.
Table 2 Parameters Parameter
Description
Protocol
Select the communication protocol TCP or ICMP.
CIDR Block
Enter an IP address segment within the following ranges:
- 10.0.0.0–10.255.255.255
- 172.16.0.0–172.31.255.255
- 192.168.0.0–192.168.255.255
Linux Port
Enter the port number for scanning Linux servers. This parameter is mandatory only when the TCP protocol is selected. If you do not need to scan Linux servers, set this parameter to 0.
Windows Port
Enter the port number for scanning Windows servers. This parameter is mandatory only when the TCP protocol is selected. If you do not need to scan Windows servers, set this parameter to 0.
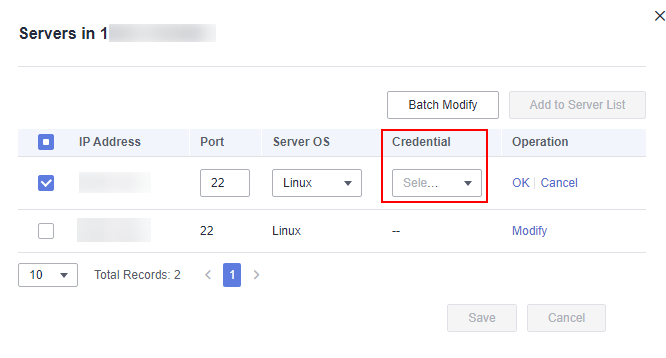
- Wait for the task status to change to Finished. Then click View Discovered Servers in the Operation column. The discovered servers will be displayed on the right of the page.

- Select a server, click Modify in the Operation column, select a credential for the server, and click OK.
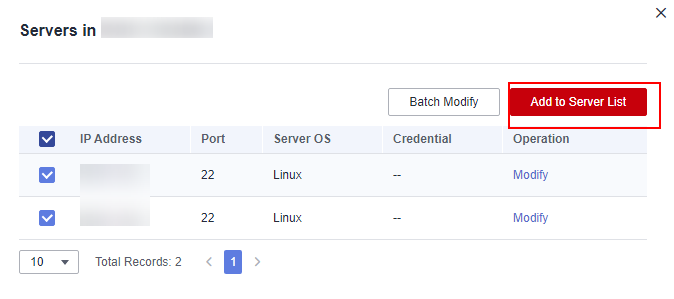
- Click Save. Select the server for which you have selected a credential, and click Add to Server List to add the server to the server list.
Follow-Up Operations
After a server is added to RDA, you can perform the following operations:
- Viewing the discovery results
In the server list, locate a server and view the status icon in the Status column.
- If the icon is
 , the discovery succeeds. You can click the server name to view the collected server details.
- If the icon is
 , the discovery fails.
- If the icon is
- Viewing the cause of a discovery failure
Hover over
 and view the failure cause.
 - Associating a credential to servers in a batch
If multiple servers use the same credential, you can associate the credential to these servers at the same time.
- In the server list, select the servers to be associated with the same credential and click Associate Credential.
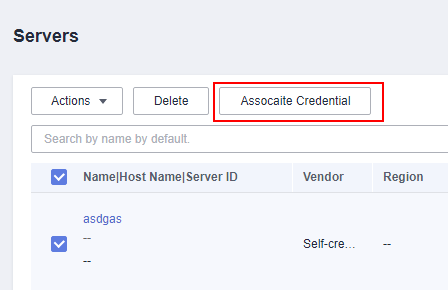
- Select an existing credential or click Add Credential to create one. Enter the credential name, username, and password, and save the credential. Then click OK.
- In the server list, select the servers to be associated with the same credential and click Associate Credential.
- Modifying the credential information or access IP address
If the cause of a discovery failure is that the username or password is incorrect or the IP address does not match the username or password, the bound credential or access IP address is incorrect. You can perform the following steps to modify it:
- Locate the server and click Modify in the Operation column.

- Modify the IP address or click Add Credential and configure the parameters, and click OK.
- Locate the server and click Modify in the Operation column.
- Rediscovering a server
After handling the discovery failure, select the server and choose Actions > Rediscover in the upper left corner to rediscover the server.

- Adding a tag
If you add a large number of servers to RDA, you can tag them for more efficient management and search.
- Select the server to which you want to add a tag and click Actions > Manage Tags.

- Select one or more tags. A tag value can be empty.
If no tags meet your requirements, click
 and create a tag by referring to Tag Management.
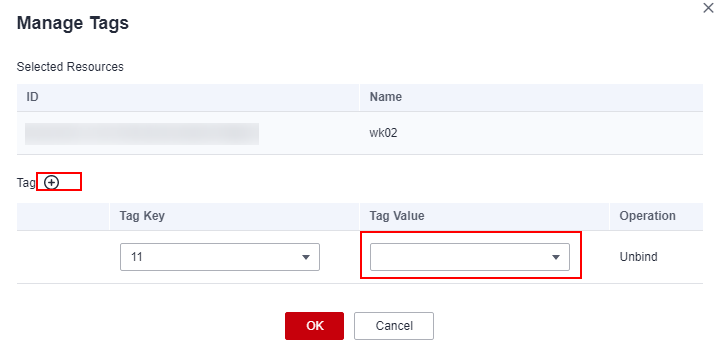
- If a tag has been added to a server before discovery, the tag will be synchronized to the server after discovery.
- When you add database servers, or container servers to RDA for recovery, if the system detects that they have the same IP addresses as those have been added to RDA, the system automatically add tags of the corresponding types to the servers added to RDA.
- Select the server to which you want to add a tag and click Actions > Manage Tags.
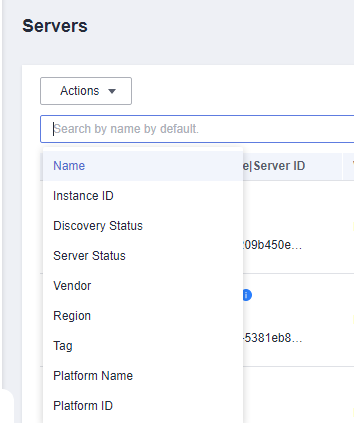
- Quick search
On the Servers page, you can enter search criteria in the search box to quickly search for servers.